
Tiny Crochet Flower Amigurumi Pattern
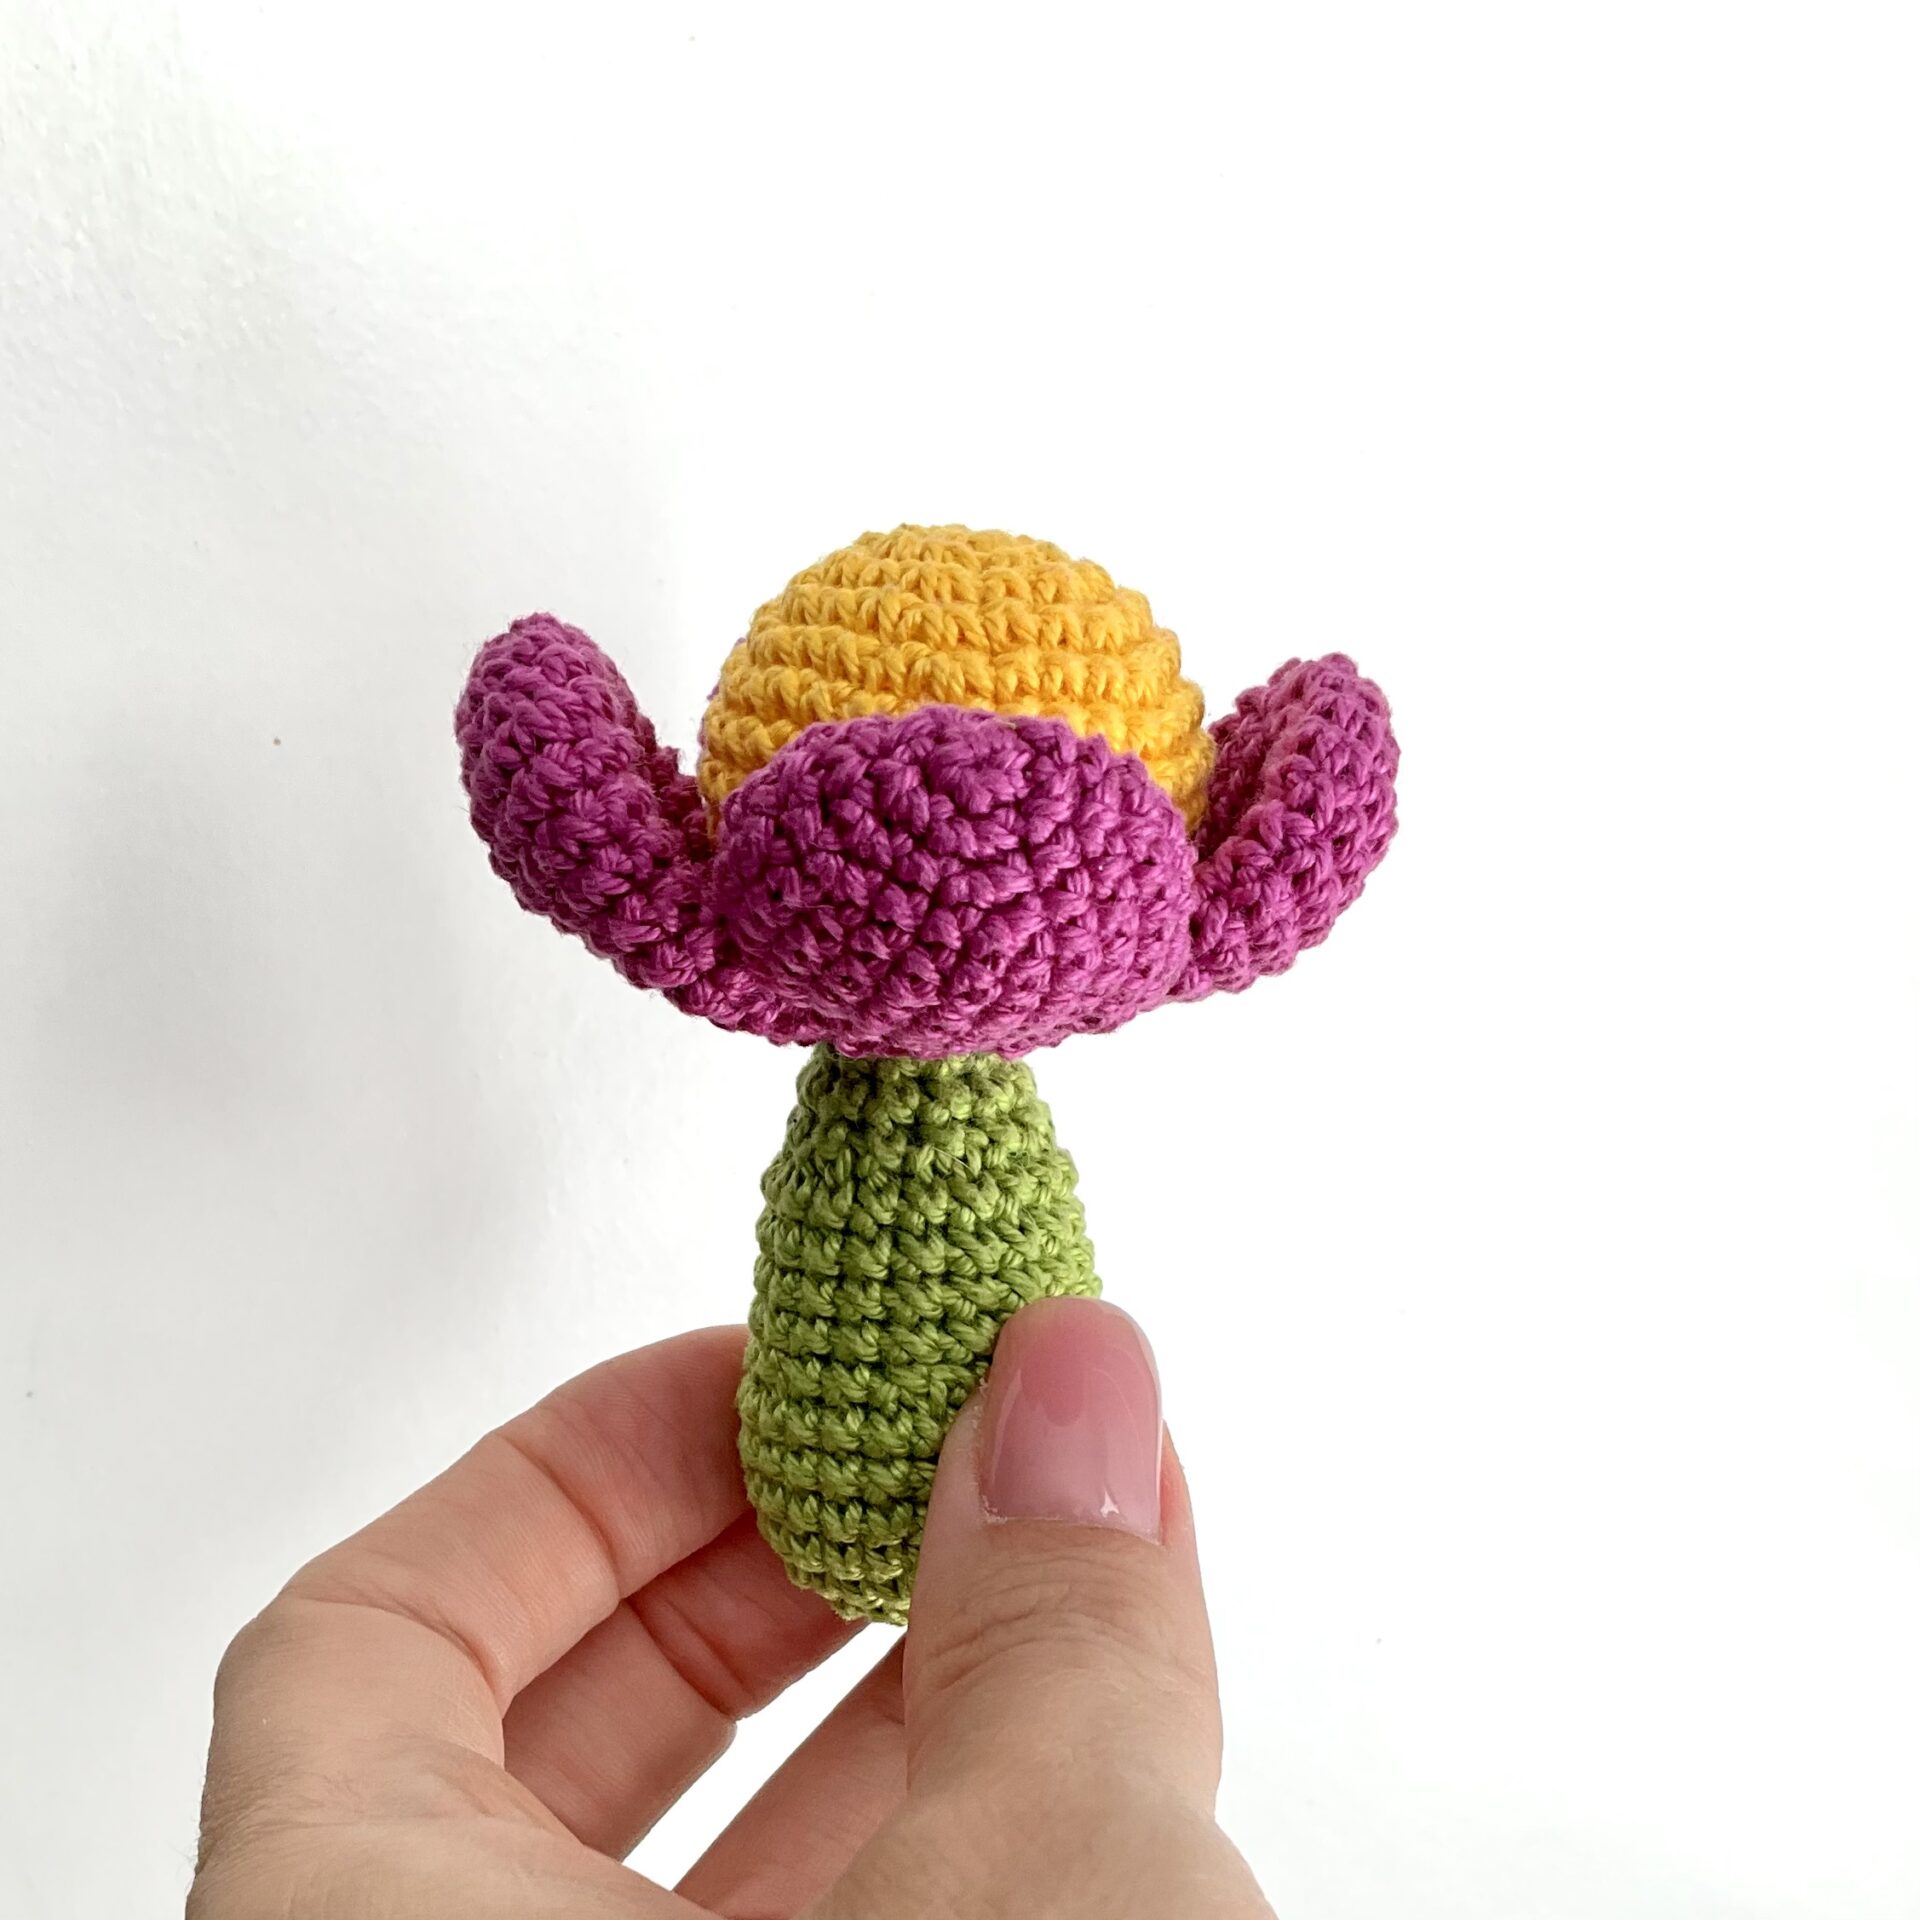
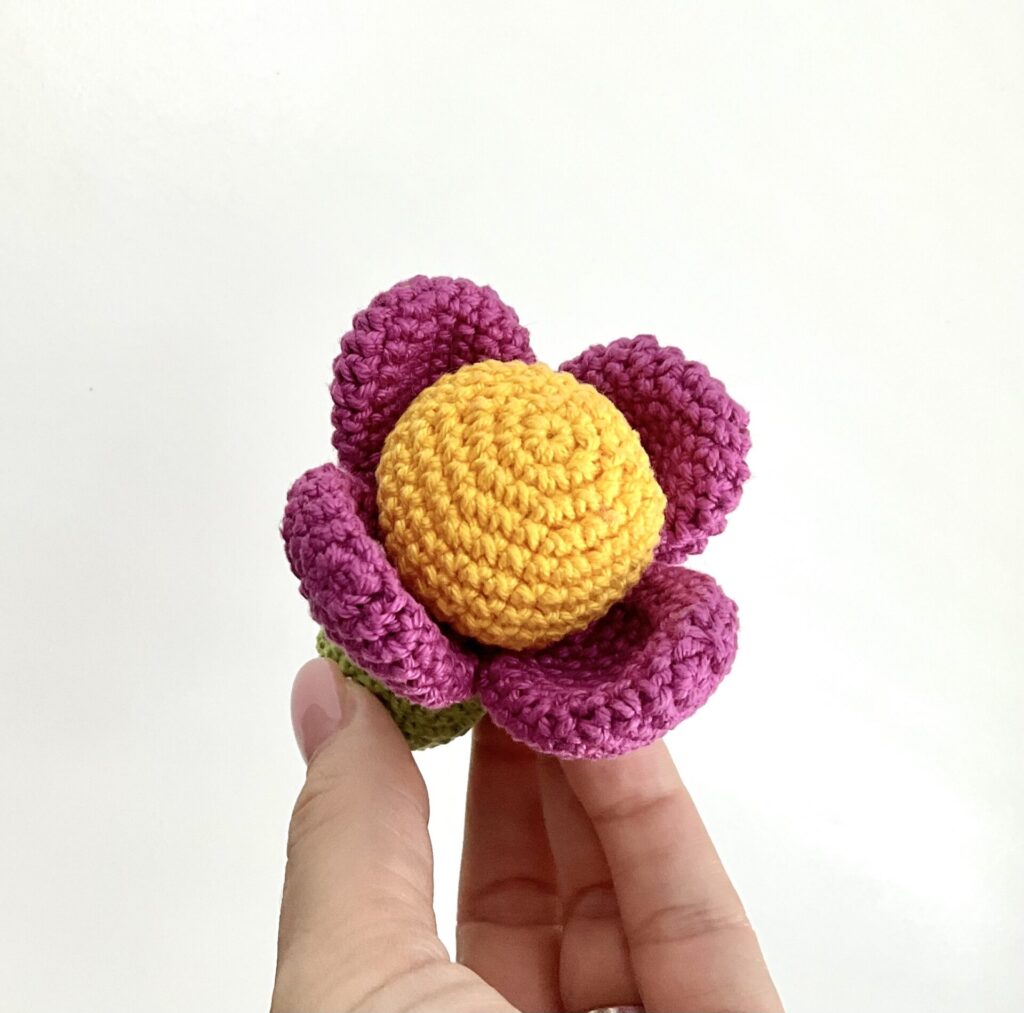
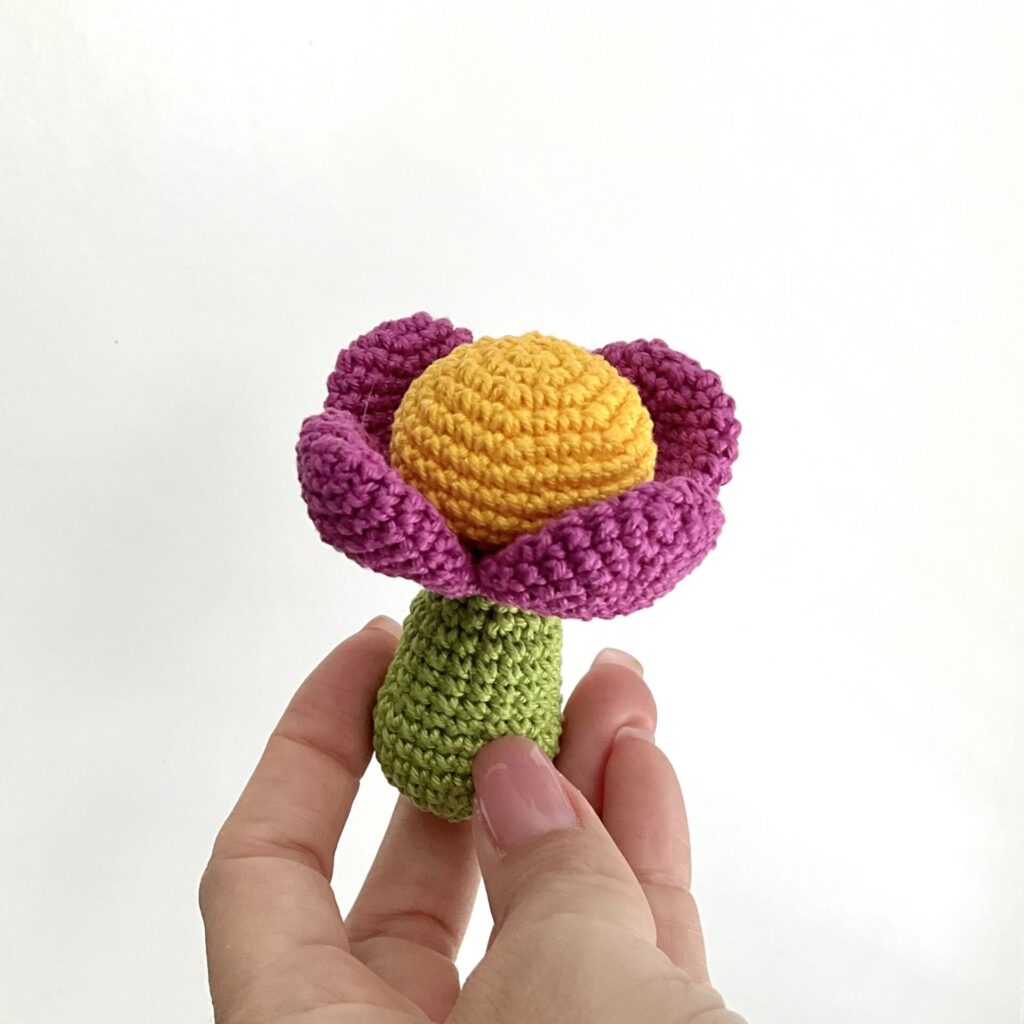
This little body comes as the first of a large family of flowers. I think of it as a baby flower. This one isn’t a rattle like it’s bigger siblings, but it is all tiny and cute. You can definitely use it for role play. Or as a heartfelt gift for your bestie. This crochet flower pattern is easy to make.
New to crochet? For more information about abbreviations, check out a full list on my post Crochet abbreviations and terms.
Crochet Baby Flower
The baby flower is a delicate yet beautiful addition to the Lali & Joli collection. It may be small, but it holds just as much charm as its bigger siblings. With its delicate petals and vibrant colors, this little body is perfect for role play and imaginative playtime. For petals, you can use any color you wish be perfect for a flower.
Basic Feaures
The pattern uses the following:
- Yarn:
- Schachenmayr: Catania (Fingering weight yarn)
- 50 g – 125 m ; 1.75 oz – 137 yds
- 100% cotton
- Colors:
- C1: anis No: 00205 (1 skein) for stem
- C2: fuchsia No: 00128 (1 skein) for petals 👉🏼 or use whatever color you like
- C3: sonne No: 00208 (1 skein) for head
- This pattern is great for your leftovers.
- Hook: 2.5 mm ; US=C/2 ; UK=12
- Polyester filling (fibrefill )
- Others:
- embroidery needle or tapestry needle
- scissors
- Optional:
- Rattle: 1 cm | 0.393 in diameter or smaller
Finished Size:
- High: 8,5 cm | 3.3465 in
- Width: 8 cm | 3.149 in
Notes
- This pattern is written in US terminology.
- For Amigurumi allways use a hook that is smaller than the size recommended for your yarn weight. This will ensure that your stuffing will not show through the stitches.
- All pieces are worked in the round. Use a stitch marker to indicate the beginning of each round.
- Invisible decreases are recommended.
- Body and head require stuffing. Stuff as you work to ensure the piece is completely filled.
- Never leave a child unattended with this toy!
Abbreviations & Terms
Abbreviations
- beg – beginning
- C – color
- ch(s) – chain stitch(es)
- dec – decrease (2 scs together) (you can use usual ar invisible decrease)
- inc – increase (2 sc in same st) (you can use usual ar invisible increase)
- MR – magic ring, also known as magic circle
- R(s) – round(s)
- sc(s) – single crochet(s)
- sl st(s) – slip stitch(es)
- st(s) – stitch(es)
General Terms
- Number of round or row is in bold and in a color as R Number (example: R 1)
- Stitch(es) repetition is in round brackets with multiplication number, see: (…) x 2 – work everything in () as a group and then repeat it as many times as written in the pattern.
- All rows/rounds start in the same stitch as the chain or stitch at the beginning of the row/round.
- Join the round with slip stitch made into the first stitch of the round, slip stitch doesn’t count as a stitch unless otherwise stated.
- Total number of stitches in one round or the row is in square brackets, orange color [… ]
- An exclamation mark indicates a change or a crucial moment → !
- Changed text color indicates a crucial moment
- If the number of some stitches is written before the stitch, work ONE stitch into each of next NUMBER of stitches (example: 3 sc).
- If the number is written after the stitch you work those stitches into the same stitch (example: sc 3).
Don’t you want to read this pattern online?
We have a solution for you:

Tiny Flower Pattern
Cute little flower to crochet for a joy. This is a DIGITAL PRODUCT! Please read the description below for more information.
Pattern Instructions
Overview
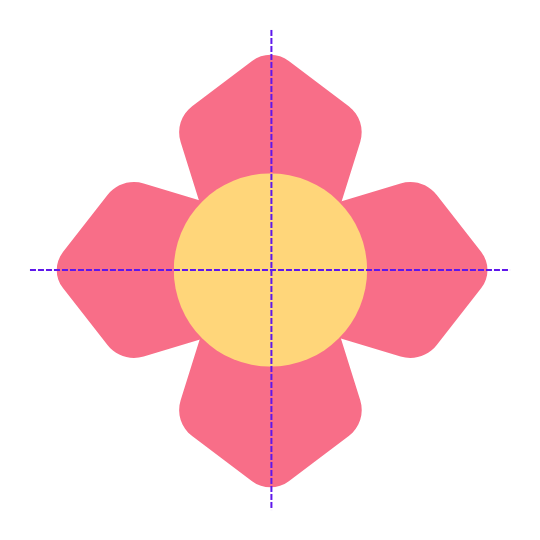
The toy is made of 6 parts in total and in 3 colors:
- Stem/Body
- Head
- Petals (4 pieces)
Stem of a flower
Stem starts from the bottom.
R 1: Start with C1 . Beg with MR with 6 scs, join the 1th sc with sl st [6]
R 2: ch, (1 inc) x 6, join the 1th sc with sl st [12]
R 3: ch, (1 sc, 1 inc) x 6, join the 1th sc with sl st [18]
R 4: ch, (2 scs, 1 inc) x 6, join the 1th sc with sl st [24]
R 5 – R 8: ch, 24 scs, join the 1th sc with sl st [24]
R 9: ch, (2 scs, 1 dec) x 6, join the 1th sc with sl st [18]
R 10 – R 13: ch, 18 scs, join the 1th sc with sl st [18]
R 14: ch, (1 sc, 1 dec) x 6, join the 1th sc with sl st [12]
R 15 – R 16: ch, 12scs, join the 1th sc with sl st [12]
End with sl st, cut yarn leaving a long tail (approx. 20 cm | 7.87 inch) to attach the head to the stem.
Stuff stem with filling
Head
Head starts from the top.
R 1: Start with C3 . Beg with MR with 6 scs, join the 1th sc with sl st [6]
R 2: ch, (1 inc) x 6, join the 1th sc with sl st [12]
R 3: ch, (1 sc, 1 inc) x 6, join the 1th sc with sl st [18]
R 4: ch, (2 scs, 1 inc) x 6, join the 1th sc with sl st [24]
R 5: ch, (3 scs, 1 inc) x 6, join the 1th sc with sl st [30]
R 6 – R 9: ch, 30 scs, join the 1th sc with sl st [30]
R 10: ch, (3 scs, 1 dec) x 6, join the 1th sc with sl st [24]
R 11: ch, (2 scs, 1 dec) x 6, join the 1th sc with sl st [18]
R 12: ch, (1 sc, 1 dec) x 6, join the 1th sc with sl st [12]
Stuff head firmly with filling
R 13: ch, (1 dec) x 6, join the 1th sc with sl st [6]
End with sl st, cut yarn and insert into the head.
Assembling Stem with Head
Join the head and body back to back. This is where the crochet rows join together.
• You will use the long tail of the body that you left after you finished crocheting.
• Sew 12 stitches around the body, and you will sew in the R 12, and R 13, you will use 12 gaps between sts.
For more details you can read a post How to Attach Amigurumi Head to the Body. It containes two video instructions as well.
Petal (make 4)
Petal starts from the top.
R 1: Start with C2 . Beg with MR with 5 scs, join the 1th sc with sl st [5]
R 2: ch, (1 inc) x 5, join the 1th sc with sl st [10]
R 3: ch, (1 sc, 1 inc) x 5, join the 1th sc with sl st [15]
R 4: ch, (2 scs, 1 inc) x 5, join the 1th sc with sl st [20]
R 5 – R 9: ch, 20 scs, join the 1th sc with sl st [20]
R 10: ch, (2 scs, 1 dec) x 5, join the 1th sc with sl st [15]
R 11: ch, (1 sc, 1 dec) x 5, join the 1th sc with sl st [10]
End with sl st, cut yarn leaving a long tail (approx. 20 cm | 7.87 inch) to attach the petal to the body.
Assembling Petals to the Head
Sew the petals directly over the line formed by the sewn stem and head. If the petals are sewn directly to the head, they will follow it nicely. Do not sew the petals to the stem.

You can combine the flower with these leaves
If you would like to enrich your flower with additional elements, you can add one or more leaves from this post.
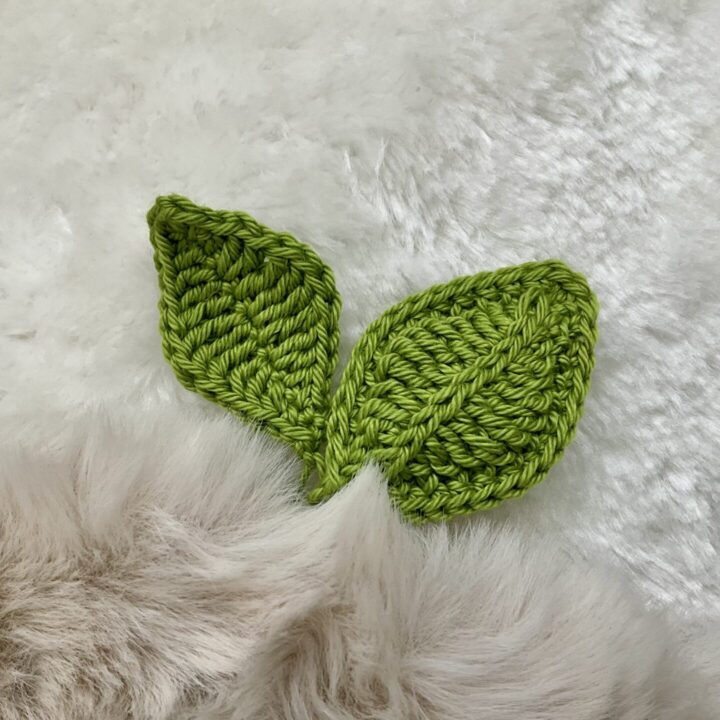
One and Two Sided Crochet Leaf
An easy crochet leaf you can use in several ways. You may use it under a bloom for your crochet toy project or for a cute headband. Also you can deside if you want to crochet amigurumi one sided or two sided leaf.
What do you think about Tiny Crochet Flower Pattern?
Do you like this pattern? What do you think about the pattern? Let us know in the comments below the post, we’d love to read them!
Did you make this project?
We would love to see what you have created so mention us @laliandjoli or tag us using #createdwithl&j so we can see your creations!
Save now, crochet later! 👇🏻

Copyright
Please be respectful of my work and do not modify, sell or share my patterns.
You can sell finished items made from this pattern if they are handmade by yourself in a limited number and you give credit to the designer. Please add the following text to your item description for any item designed by Hana Ráczová – Lali and Joli that you are selling:
„This product is handmade by [your name] from a design and pattern by Hana Ráczová at Lali and Joli. See www.laliandjoli.com for more information.“
Mass production using my patterns is not allowed.
COPYRIGHT ©Hana Ráczová – www.laliandjoli.com 2024 – ALL RIGHTS RESERVED WORLDWIDE
YOUR RIGHTS: This pattern Tiny Crochet Flower and its content are restricted to your personal use only. It does not come with any other rights.
This pattern Tiny Crochet Flower and its content are protected by international copyright law and may not be modified, compiled, combined with other content, copied, recorded, synchronized, transmitted, translated, formatted, distributed, publicly displayed, publicly performed, reproduced, given away, used to create derivative works and otherwise used or exploited (including for-profit) without the creator’s expressed permission. The creator retains full copyrights to this pattern Tiny Crochet Flower and its content. Any portion of graphics, photography, elements or other creative content is the copyright of the respective owners and is used within the terms of license(s) and/or granted permission(s).
The creator has made every reasonable effort to be as accurate and complete as possible in the creation of this pattern Tiny Crochet Flower and its content, and to ensure that the information provided is free from errors; however, the creator assumes no responsibility for errors, omissions, or contrary interpretation of the subject matter herein and does not warrant or represent at any time that the contents within are accurate due to the rapidly changing nature of the subject matter.
Any perceived slights of specific persons, peoples, or organizations are unintentional. Any product, website, and company names mentioned in this pattern Tiny Crochet Flower and its content are the trademarks or copyright properties of their respective owners. The creator is not associated or affiliated with them in any way. Nor does the referred product, website, and company sponsor, endorse, or approve this pattern Tiny Crochet Flower and its content.


